
Section 2 · Lesson 3 of 6
How to Generate, Edit and Organize AI Images
On the Workspace Image tab, pick a model (the lesson uses Nano Banana 2), keep 16:9, type a prompt and click Generate. Turn on Web Grounding when the picture needs today's information, such as a weather card. To edit a picture, hover over it, click Add as Reference and describe the change, such as "add a cat in that image"; everything else stays as it was. Reuse Parameters brings back a result's settings, and folders keep your files in order.

Step 1: Generate your first image
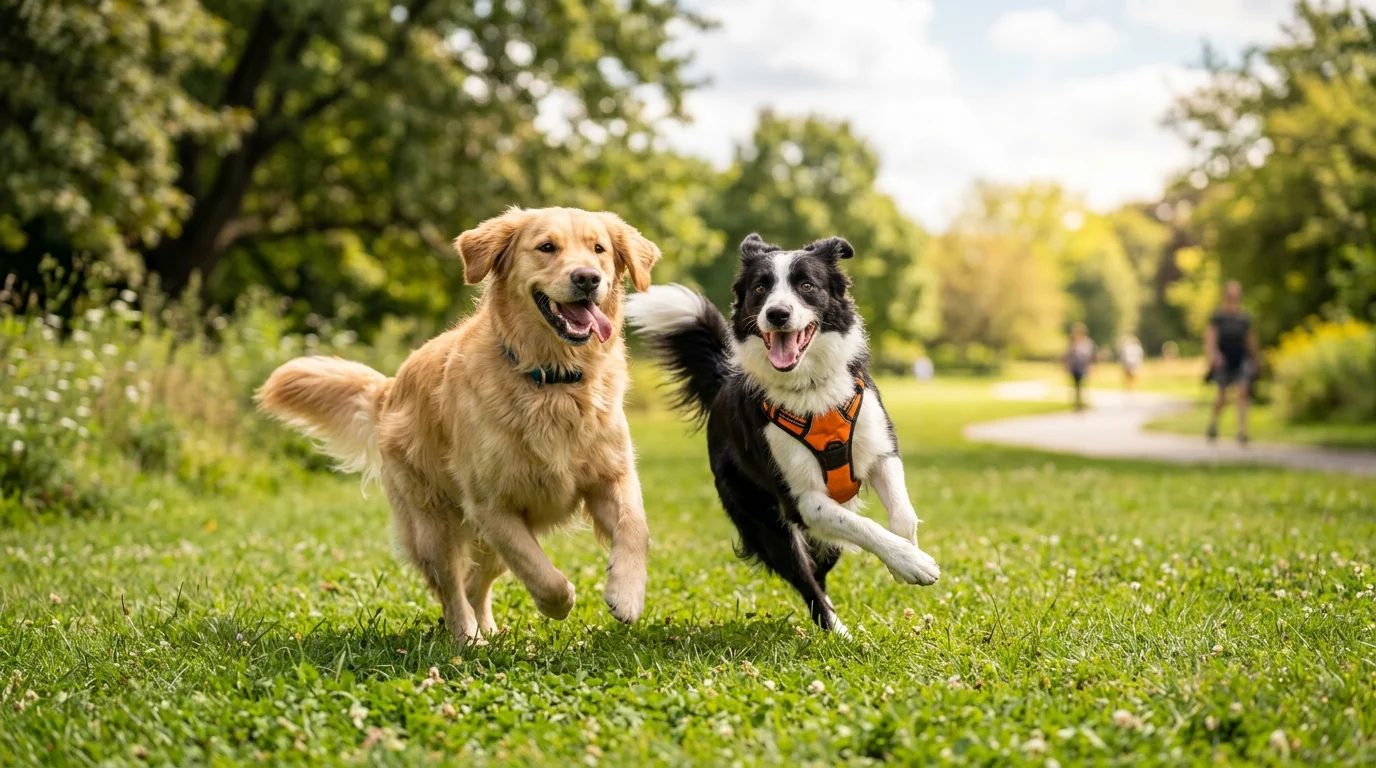
Open the Image tab in the Workspace, choose Nano Banana 2 as the AI model and keep the aspect ratio at 16:9 (try others too). Type your prompt and click Generate. The result appears on the right; in the lesson it took 21 seconds.
two happy dogs
Step 2: Add live information with Web Grounding
With Web Grounding on, the model searches the web for the latest information and uses it in the picture, so you don't have to look it up yourself. Web Grounding works with Nano Banana 2.
a weather card of today's San Francisco
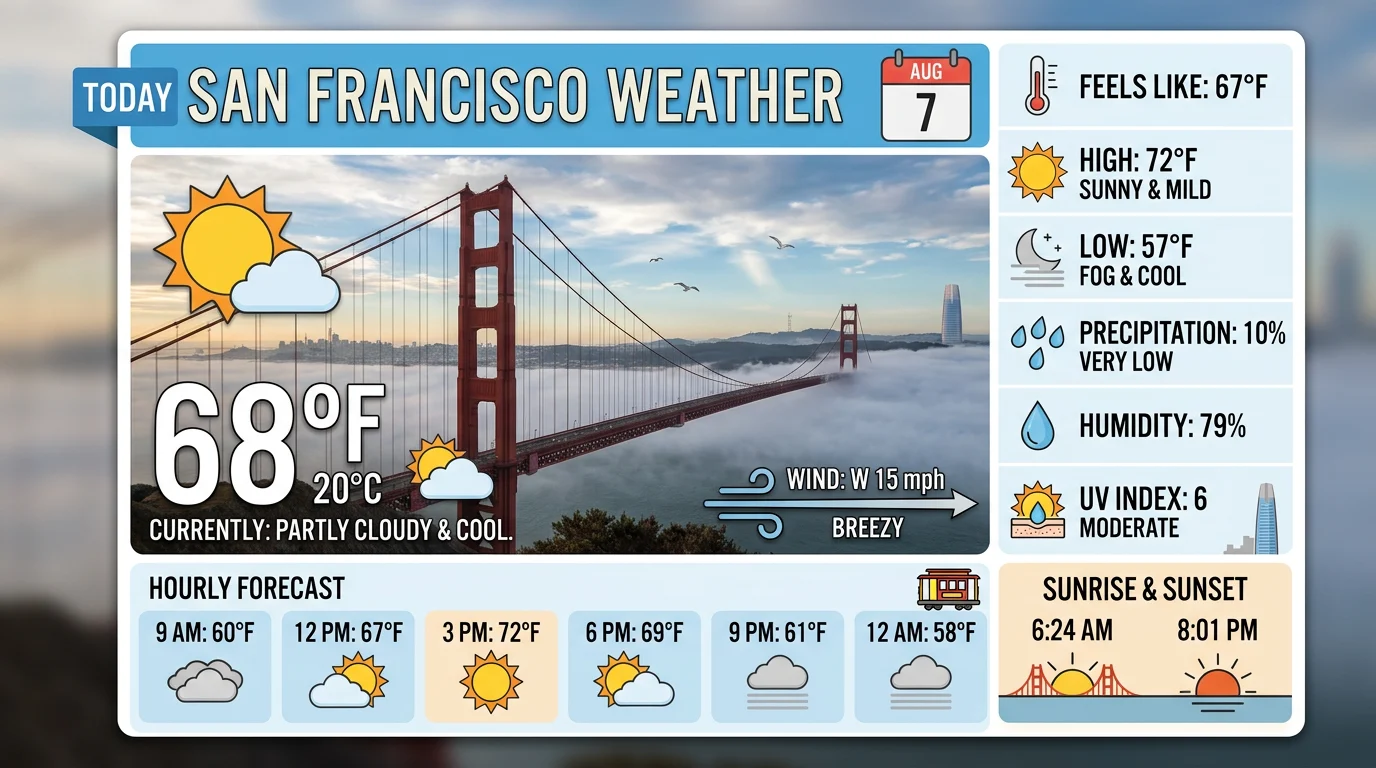
The same prompt with Web Grounding off drew a card dated years earlier: without the search, the model can only use what it learned. When a picture needs current facts, remember to turn Web Grounding on.
Step 3: View, download and reuse your results
- Click a result to open it in Single View. From the toolbar you can download it or zoom in, and the arrows move between your files.
- Results show in Grid View; switch to List View in the top right corner.
- Reuse Parameters under a result restores its settings, including the prompt and whether Web Grounding was on, so you can try again with one change.
Step 4: Edit a picture with Add as Reference
Hover over a picture and click Add as Reference in the row of buttons that appears. The picture moves into the reference area at the top left. Now describe only the change you want and click Generate.
To remove a reference, hover over it and click the trash can; to use your own picture, click Add and upload it.
add a cat in that image
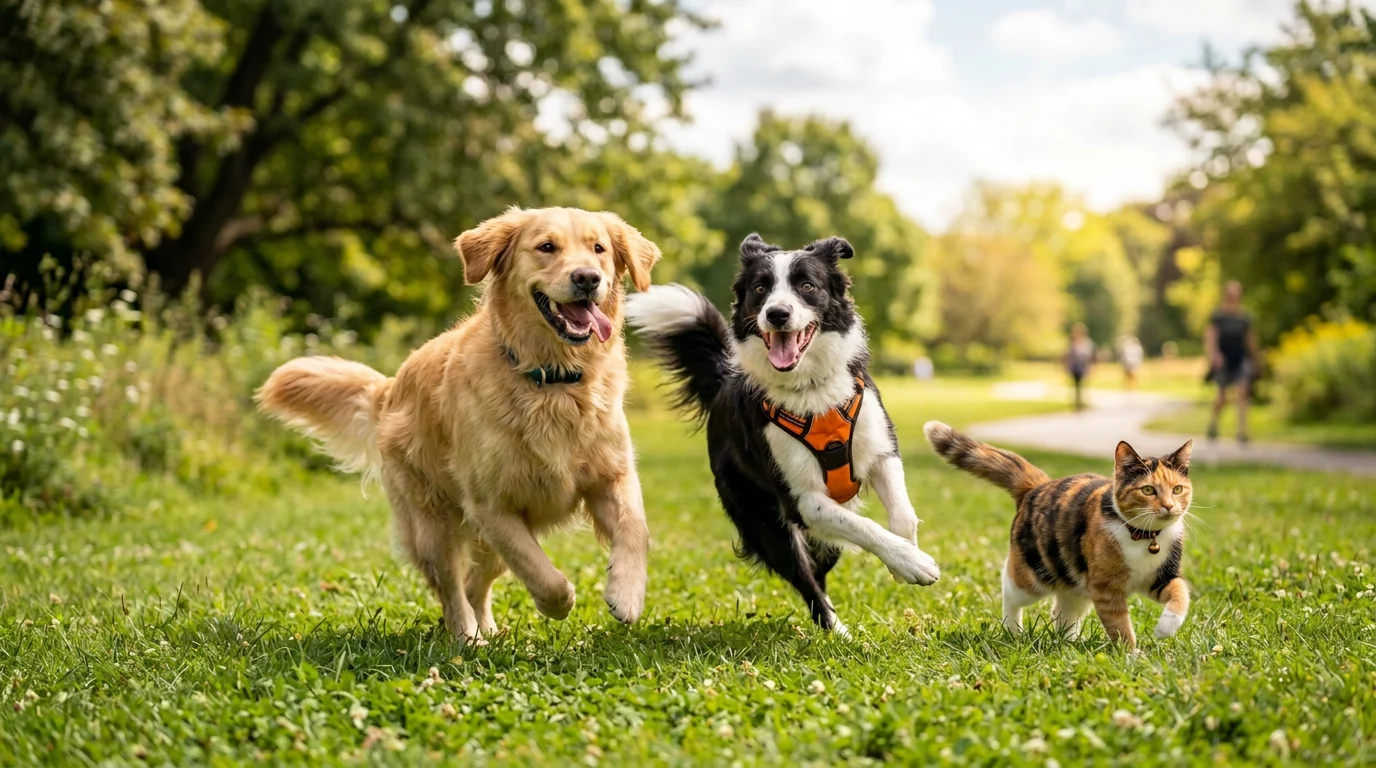
The two dogs stay exactly the same, and the cat's light matches the rest of the picture, so it is hard to tell it was added. The same way works for a new style: add the edited picture as a reference and ask for it.
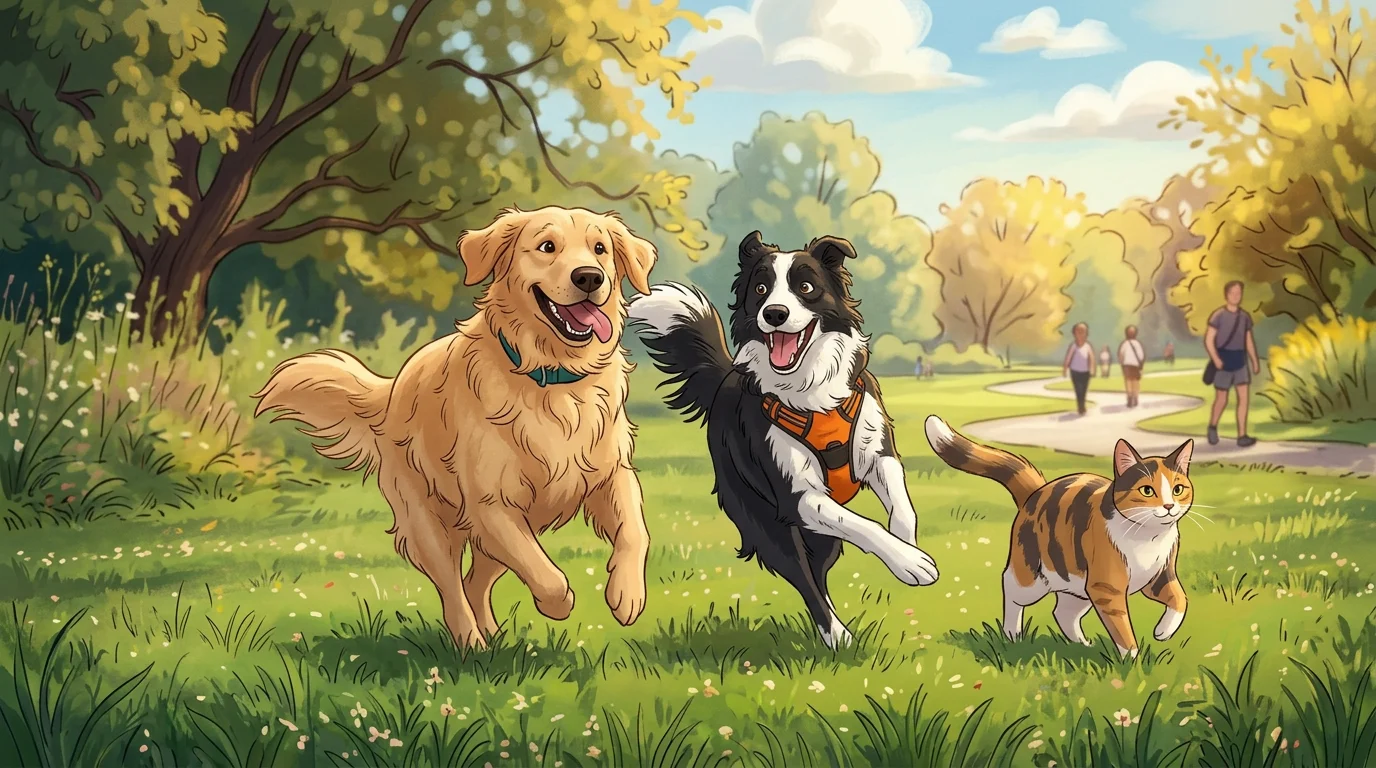
change image style to Disney style
Step 5: Search and organize your files
- Search: type a word in the search bar, such as "dog" or "San", to find matching files.
- Select several files with the multi-select button in the top right corner, then download them all as one ZIP file, delete them, or click Move to put them in a folder.
- Folders: name a new folder and click the plus button; open your folders with the Folders icon in the top right corner. Hover over a folder's name to rename it.
- Deleting a folder asks whether to delete only the folder or the folder and its files. Deleting only the folder keeps the files in your Workspace.
Frequently asked questions
What is Web Grounding?
A switch on the Image tab that lets the model search the web for the latest information, such as today's weather, and use it in the picture. It works with Nano Banana 2.
How do I edit an AI image without changing the rest?
Hover over the picture, click Add as Reference, and describe only the change, for example "add a cat in that image". The model keeps everything else.
Can I get back the settings of an earlier image?
Yes. Click Reuse Parameters under the result: the prompt, the model and the switches come back as they were.
Can I download many images at once?
Yes. Select them with multi-select and download them as one ZIP file.
Transcript
0:00 · Generate your first image
Today, this part of the lecture focuses on the AI Image feature under Workspace. We'll select the Nano Banana 2 model. Keep the aspect ratio at 16:9, although you can also try other ratios. In the prompt area, I'll enter "two happy dogs" and click the Generate button. The panel on the right shows that the image is being generated. Once it finishes, our two happy dogs are ready. The total generation time was 21 seconds.
0:32 · Add live information with Web Grounding
Next, let me show you the Web Grounding feature. When it is enabled, the model searches for the latest information. For example, I'll use the weather as a test. In the prompt area, I'll enter "a weather card of today's San Francisco". Because Web Grounding is enabled, the model searches the web for today's weather in San Francisco and uses the live data to generate an image. This saves you from having to search online for the latest weather information yourself.
1:01 · Single View, Grid View and Reuse Parameters
While we wait, let's look at the controls on the right. Click the image of the two happy dogs to enter Single View. The image becomes larger. In the toolbar at the top, click the download button to save the image, or click the Zoom button to enlarge it. Click the image again to exit the zoomed view. You can also use the left and right arrows to switch between the generated files. The default view is Grid View, and you can choose List View in the top right corner. For content you have generated before, click the Reuse Parameters button. The system automatically restores the previous settings, including the prompt. You can see that the prompt here has changed from the weather card back to "two happy dogs", and Web Grounding has also been turned off.
1:50 · Edit a picture with Add as Reference
Now let's return to Grid View. Move your cursor over the two happy dogs image. A row of buttons appears in the lower left corner. Click the Add as Reference button, and the image will be added to the top left reference area for the AI image model. We can now edit this image. In the prompt area, change the text to "add a cat in that image". The AI model will choose an appropriate position and add a cat to the image. Click the Generate button. When you move your cursor over the reference image, a trash can icon appears. Click it to delete the reference, or click Add to upload your own image from your computer.
2:33 · Check the grounded weather card
Now let's look at the weather image generated with Web Grounding enabled. I'm recording this video on August 7th, and the date shown on the image matches today's date. I also compared it with a weather app, and the data is very close. The image with the added cat has also finished generating. The result looks very natural. You can see that the two dogs remain unchanged, while the cat's lighting blends naturally with the overall image. It is difficult to see anything artificial.
3:05 · Change the style and search your files
Now we'll use the latest cat and dog image as a reference. Click the Add as Reference button below the image. Return to the prompt area, change the text and click Generate. While we wait, click the Reuse Parameters button below the weather image. This time, let's try turning off Web Grounding while keeping everything else the same, and see how the result changes. While we wait, let me share one more feature. You can use this search bar here. For example, type "dog", and files related to dogs will appear. If you type "San", the weather card for San Francisco that we just generated will appear. The style transfer image is now ready, so let's take a look. Overall, the result looks quite good.
3:51 · The weather card with Web Grounding off
The weather card generated with Web Grounding turned off is also ready. You can see that the date shown is October 6, 2023, so it cannot provide the latest real-time information. If you want the generated content to include current information, remember to turn on Web Grounding.
4:10 · Select, download and organize files in folders
Now let's go to the multi-select function in the top right corner. You can select multiple files at once. We'll select these five files. At the bottom, you can choose to download them all as one ZIP file, delete the five files in bulk, or click the Move button to move them into a folder. You can give the folder a name, click the plus button, and then click the Folders icon in the top right corner. The folder we just created and the five files will appear here. Move your cursor over NewSet, and an edit icon appears so you can rename it. For example, if we want to delete the weather card, click the trash can button. This permanently deletes the file. It does not simply remove it from the folder, so keep that in mind. We can also move the two weather card images into a new folder, so we now have two folders. If I delete one weather card image from the Dogs folder, that same image will be deleted from both folders and will no longer be available anywhere. We can also delete an entire folder. A confirmation will ask whether we want to delete only the folder or the folder and its files. If we choose to delete only the folder, the dog photos can still be added back later. I can first create an empty folder called Dogs, then return to the workspace. You can see that one weather card image is no longer shown in the current view. We can select the three dog photos, click Move and place them in the empty Dogs folder. This makes it much easier to keep the files organized.